Mixed Media Morsels & more

Tips, Ideas, and Inspiration

I’ve been making some little embellishments lately to use in my collage journals. My goal is to use some of the stuff I already have – you know, the stuff that keeps piling up… gel prints, painted papers, etc. I often call myself a pilot – I “pile it” here, there, and everywhere, lol. Having a few piles is not so bad; I actually like having a stack of ready-made painted papers to choose from, when I sit down to create mixed media projects. At some point, however, I have to take charge of the paper piles and I have found that making collage embellishments is a fun and easy way to do that.

A few weeks ago, in an impromptu live stream on my YouTube channel, I took one of my gel prints and decided to draw a leaf using a white, Extra Fine point Posca pen (my favorite). Any opaque paint pen, a white-out correction pen, or white paint/ink and a small brush can be used. I drew the leaf, and a leafy stem, then cut them out, and I just loved the outcome! I knew I would be making more of these, and I did.

Turns out, making these little embellishments is a great way to use some of my darker, non-favorite painted papers. We already know that those large, busy-looking prints can be cut or torn into small pieces that look really cool, and that’s basically what I’m doing here. They’re so great for collage and they are our very own designs!

In a very short amount of time, I doodled several simple images and cut them out. I’m so excited that I now have a little container that is filling up with fun, colorful embellishments, that are ready to go, whenever I want to create a journal page or decorate a tag or envelope. Another bonus is that the paper piles are beginning to shrink. The small embellishments are much easier to store than the large paper piles and they’re so easy to use, having already been created!

I’m offering a freebie for you below. It is one sheet that contains two of my painted papers, with some of my hand-drawn doodles, that you can download and then print and cut out to use in your projects. I chose not to doodle on half of one of the painted papers, in case you would like to use some of that one as background material.

Doodling little images onto painted papers is a great way to get your creative juices flowing, and also a simple way to get started if you’re feeling stuck. So, grab your paper piles and have some fun!

See you next time,
Cat

As most of you already know, I love my coffee, so I decided to make a coffee junk journal, using a 6×9-inch envelope, some random papers, photos, and coffee ephemera. I’m having so much fun adding bits and pieces to the pages of this little journal, along with filming the process to create videos for my YouTube channel. Click here if you’d like to see those videos.

The following photos are a sampling of some of the pages in my journal.

Since I was having such a good time with this little journal, I thought it would be fun to make an extra one to give away. I adhered some gift wrap pieces to one side of the envelope, creating the front and back covers. I used a piece of burlap-printed tissue paper for the inside covers. The pages have been sewn in and I’ve added just a few items throughout the journal to give the winner a head start on filling the pages. There are also some extra goodies in the large pocket, which is part of the back cover.

Everything included in the giveaway is shown in the photo below.

To get a better look at the giveaway journal in its entirety, click here.

HOW TO ENTER:

First, follow my blog (if you haven’t already done so). It’s very easy to do: just scroll up to the “Follow via email” box on the right hand side of this page, enter your email address, and click the Follow button. Done!

***If you’re using an iPhone, click on the Comments box at the top of the post. Then scroll to the bottom of the post. You will see comments and also the “Follow via Email” box.***

Next, click on this link: Coffee Journal & Embellishments Giveaway, then log in and answer one question related to a particular page in my coffee journal.

That’s all there is to it!

After the giveaway has ended, I will post another video to share the name of the randomly selected winner. I will then contact the winner via email to request their mailing address.

Thanks so much for following my blog and for participating in this giveaway – I’m excited to see who will win!

See you soon,

Cat

Okay, full disclosure here… my art room – probably just like yours – turns into a hot mess at times. As creative individuals, we have, and use, a lot of stuff! This can be both a blessing and a curse. Creating art, using purchased items, as well as repurposing junk pieces, can be very rewarding. But if all the ‘stuff and things’ begin to pile up around us too much, we can start to feel very claustrophobic and that can literally kill creativity. I know that feeling all too well – but it doesn’t have to be that way. 

Organizing my supplies is the easiest way for me to keep track of everything. As you can see in the photo above, I do have a lot of things starting to pile up. Okay, they’re way past “starting” to pile up, LOL, but since I have a place for everything to go, it’s a pretty quick cleanup process. (Unless I find something interesting in the piles and sit down and start creating with it, LOL!) The simplest solution for me, is to use lots of Sterilite plastic drawer units that can be purchased easily, and a few at a time, if I don’t want to spend too much in one shopping trip. They can also easily be labeled, so that I know which supplies are in each drawer.

These particular drawers are directly to my left when I’m sitting at my work table. I keep some scraps in the top drawer, and the other three are holding projects that I’m currently working on. I can take everything out of a particular drawer to work on a project, and then when it’s time to clean up, it all goes back into its own drawer. If necessary, I will label the drawers with a sticky note instead of a more permanent label, since the things in these drawers change all the time.

Another very handy item I’ve been using since last year is a metal file organizer. Am I using it for files? Nope! This organizer sits directly to the right of my work table and very nicely holds the bigger items that I use on a regular basis. Honestly, I’m not sure how I managed so long without it!

It’s very frustrating to sit down to create and not be able to find something I need, and then have to spend all my creating time looking for that thing! So, last year, I made a decision to organize my supplies better and to be more consistent with putting things away when I’m finished using them. I am doing much better, but there are still times when I get really busy, and when that happens, I get a little behind in my cleanup duties. However, knowing that everything has a place to go, makes all the difference in the world, and cleaning up the mess is so much less stressful! And less stress equals having more fun creating.

It’s definitely a great feeling to come into my art room to create when it’s all cleaned up and everything (well, maybe not everything…) is in its proper place. 

I want everyone to know that you’re not alone in the mess we all make, with all this stuff we collect to use in our creative lives. Organizing it can be a bit daunting, but it can be done, by tackling small areas/piles at a time, instead of looking at the room/area as a whole, and feeling completely overwhelmed. Keep a positive attitude and believe me when I tell you that as each area/pile gets organized, you will be motivated to get another one done, then another, and so on. Once the organizing process is finished, you’re all set for fun times creating, without the feeling of dread that comes along when stuff piles up around you, as it will do.

I have learned that it is so much easier to create when I know where to find and replace all of my supplies. My hope is that this post helps you to get yours organized too, so you will feel your creative mojo returning.

Thanks for stopping by,
Cat

In my Mixed Media Morsels YouTube video series for 2020, I am creating a small, fabric-covered traveler’s notebook-style journal, and altering the pages of a checkbook register sewn inside it. The series is called Mixed Media Morsels Motivations, and I’m providing one motivational quote each month so that everyone participating can use it on their journal page. For the month of January, the quote is about losing our fear of being wrong.

January’s page

You can click the following link to my YouTube video, to see how I created this page: MMM Motivations, Page 1 – Lose Our Fear

We all sometimes experience the fear of doing something the wrong way, or feeling that others will think we are doing it wrong. In creating art, it can be a paralyzing fear – one that has the capability of keeping us from creating at all.

The good news is that we have the power within us to choose to say no to that fear. It can be challenging to do this, especially if you haven’t done it before, but it works! It’s easier than you think to make the decision to not let fear have the upper hand. Art should be a fun, completely enjoyable experience, so if you’re not having fun, or you’re finding that you can’t even begin, take a moment, think positively, and say to yourself, “Fear has no place in my art. I’m going to enjoy this process, no matter how it looks in the end. I have these art supplies and I’m going to have fun playing with them.” If you’re not happy with how it’s looking, don’t forget that in mixed media art it’s all about the layering, so add more layers! Glue a scrap of paper here and there, add a bit of paint, stamping or stenciling, until you like it. Maybe it needs a border or a focal image. You can use stickers, magazine or book images, etc., but whatever you do, just start and don’t give up. The more you practice playing and just enjoying the process, regardless of the outcome, the easier it gets. Remembering that mixed media art is not meant to be perfect helps, too. It’s a messy, fun playtime, and if you think of it in that way, and keep a positive attitude, you may find yourself relaxing a little and enjoying it more.

So, let go of that fear and just play! You’ll be so happy you did.

See you next time!
Cat

IMG_5241e

A few days ago, I had fun creating in the old book I’m altering, making a page that featured a large, colorful butterfly. This page came about because I had some small, water colored paper scraps that I just couldn’t throw away. I had saved these beautiful scraps to hopefully use in a mixed media art project, but for several months I kept moving them around my desk because I was working on other things and hadn’t had an opportunity to get to the scraps project yet. So, as I was tidying up, I came across them once again and decided to just sit down and create something with all that color. I turned on my camera and you can check out my YouTube video here if you’d like to see my process.

I received a few questions about how I had created the butterfly, so I’d like to share that information in this post.

I drew half of a butterfly on a piece of printer paper, then drew some shapes inside the wings. I cut out the butterfly and the shapes and then transferred the image to a piece of slightly glossy black paper that was included with a stencil I had purchased. I used a white china marker to outline the butterfly on the black paper (a white crayon can also be used) and then I cut it all out again. I was able to use my fingernail to easily scrape away any of the remaining white wax from the slick, black paper I had used.

IMG_E5267[1]e

I lightly traced the butterfly onto my book page before I painted the background color. As you can see in my video, I added some stenciling to the background and collaged the colored scraps inside the pencil lines I had drawn on the page. Next, I used some gold paint and stamped some floral images on the black butterfly outline, then adhered it over the top of the collaged pieces.

This was a simple page, but it had a very dramatic effect, as the black outline of the butterfly made all those little scraps burst with even more color! I don’t think I will ever tire of experiencing the joy of seeing what can be created with scraps – it just never ceases to amaze me!

I would like to share a little of my joy with you, so I’m offering a free template of my hand-drawn butterfly so you can create your own project. Click here to print it out. Be sure to print “actual size” if you want your butterfly to be the same size as mine.

Also, stop by and check out my Facebook group, Random Remains REVIVED! and share what you create with your scraps. You’ll find lots of inspiration and some really nice folks there, too! 😉

Until next time,
Cat


It’s been a while since I posted here, and that’s because I spend a lot of time at the end of each year with my family, doing fun holiday things together – and I wouldn’t have it any other way. I hope you have enjoyed your holidays and are excited to see what the coming year will bring. I know I am!

I would like to personally wish each and every one of you a very happy and prosperous New Year, one that’s filled with many blessings and joyful times with family and friends.

See you in 2019!

Cat

Recently, I sat down to create a birthday card for a dear friend. We have known each other since 1st grade {a VERY long time!} and I enjoy creating unique cards for her. This one was inspired by my recent creation for my YouTube video Morsel Mash-ups Challenge #9, in which I had painted a stamped image from Dina Wakley’s “Scribbly Birds” stamps set. When I created my card, I picked a different bird, but painted it the same color. For the card’s background, I went through my pile of gel prints and found one from a couple of years ago. I didn’t have any immediate plans for it when I created it, but I held onto it, and I’m glad I did!

Here’s a short video, just for my blog followers, showing my process in creating the card front:


IMG_E3795

To finish it off, I adhered hand-lettered words, and then matted the card front with dark green card stock, to give it a nice frame on the white card base.

IMG_3801(Edited)

I love how the card is bright and whimsical, yet it has a vintage-y feel.

IMG_E3802

One of my favorite things to do is just ‘be still’ for a few moments and watch wild birds in nature. I know that my friend enjoys doing this as well, and I hope her birthday is filled with joyful things!

Before I go, I also wanted to share a video of a song entitled “Be Still,” by Hillsong Worship. I love this song and I hope you will be blessed by it as much as I am.

Take care, everyone! 🙂
Cat

I really enjoyed creating some altered tea bags in my recent Mixed Media Morsels, Dessert #9 video on my YouTube channel. It was my first time altering tea bags and I found it quite fun! I also did a Second Helping” video, where I explained a little more about different tea bags and how they stain, as well as some other information about how I empty them and then use them in my art.

I used one of the tea bags I altered as my focal point for this month’s tag. Once again, it was a very simple process.

IMG_3484e

For the tag’s background, I adhered a napkin with a glue stick and then sealed it with Collage Pauge.

IMG_3490e

I loved how it had a simple linen look, with a red border at the bottom, matching the tea bag perfectly! I used a hole Reinforcer sticker by Tim Holtz on both sides of the tag.

IMG_3492e

Even though I liked the simple aspect of the napkin, I felt it needed a little something else, so I stamped some text on it, which gave it some added interest.

IMG_3494e

I made sure to catch the tea bag’s string in with the ribbon and sari strip that I tied onto the top, which lifts the little tag and allows it to dangle. I added a couple of dots of glue to hold the string in place and then stamped three curly doodles around the edge of the tag.

IMG_E3633e

This is an awesome way to use something different in your art, and the best part is that it’s something that most of us already have in our homes. And if you’re not a tea drinker, there’s a good possibility that you know someone who is, and maybe they would be willing to save a few tea bags for you. Also, if you don’t drink tea, you might consider brewing some to stain papers, fabric, or laces, which are perfect to use in vintage-style junk journals. Then you’ll have the bags to alter as well!

Those of you who know me, know that I’m more of a coffee girl than a tea girl. But I’ve come to realize that tea does have its place. 😉

See you next time,
Cat


Check out my Amazon store to see products I use and recommend.

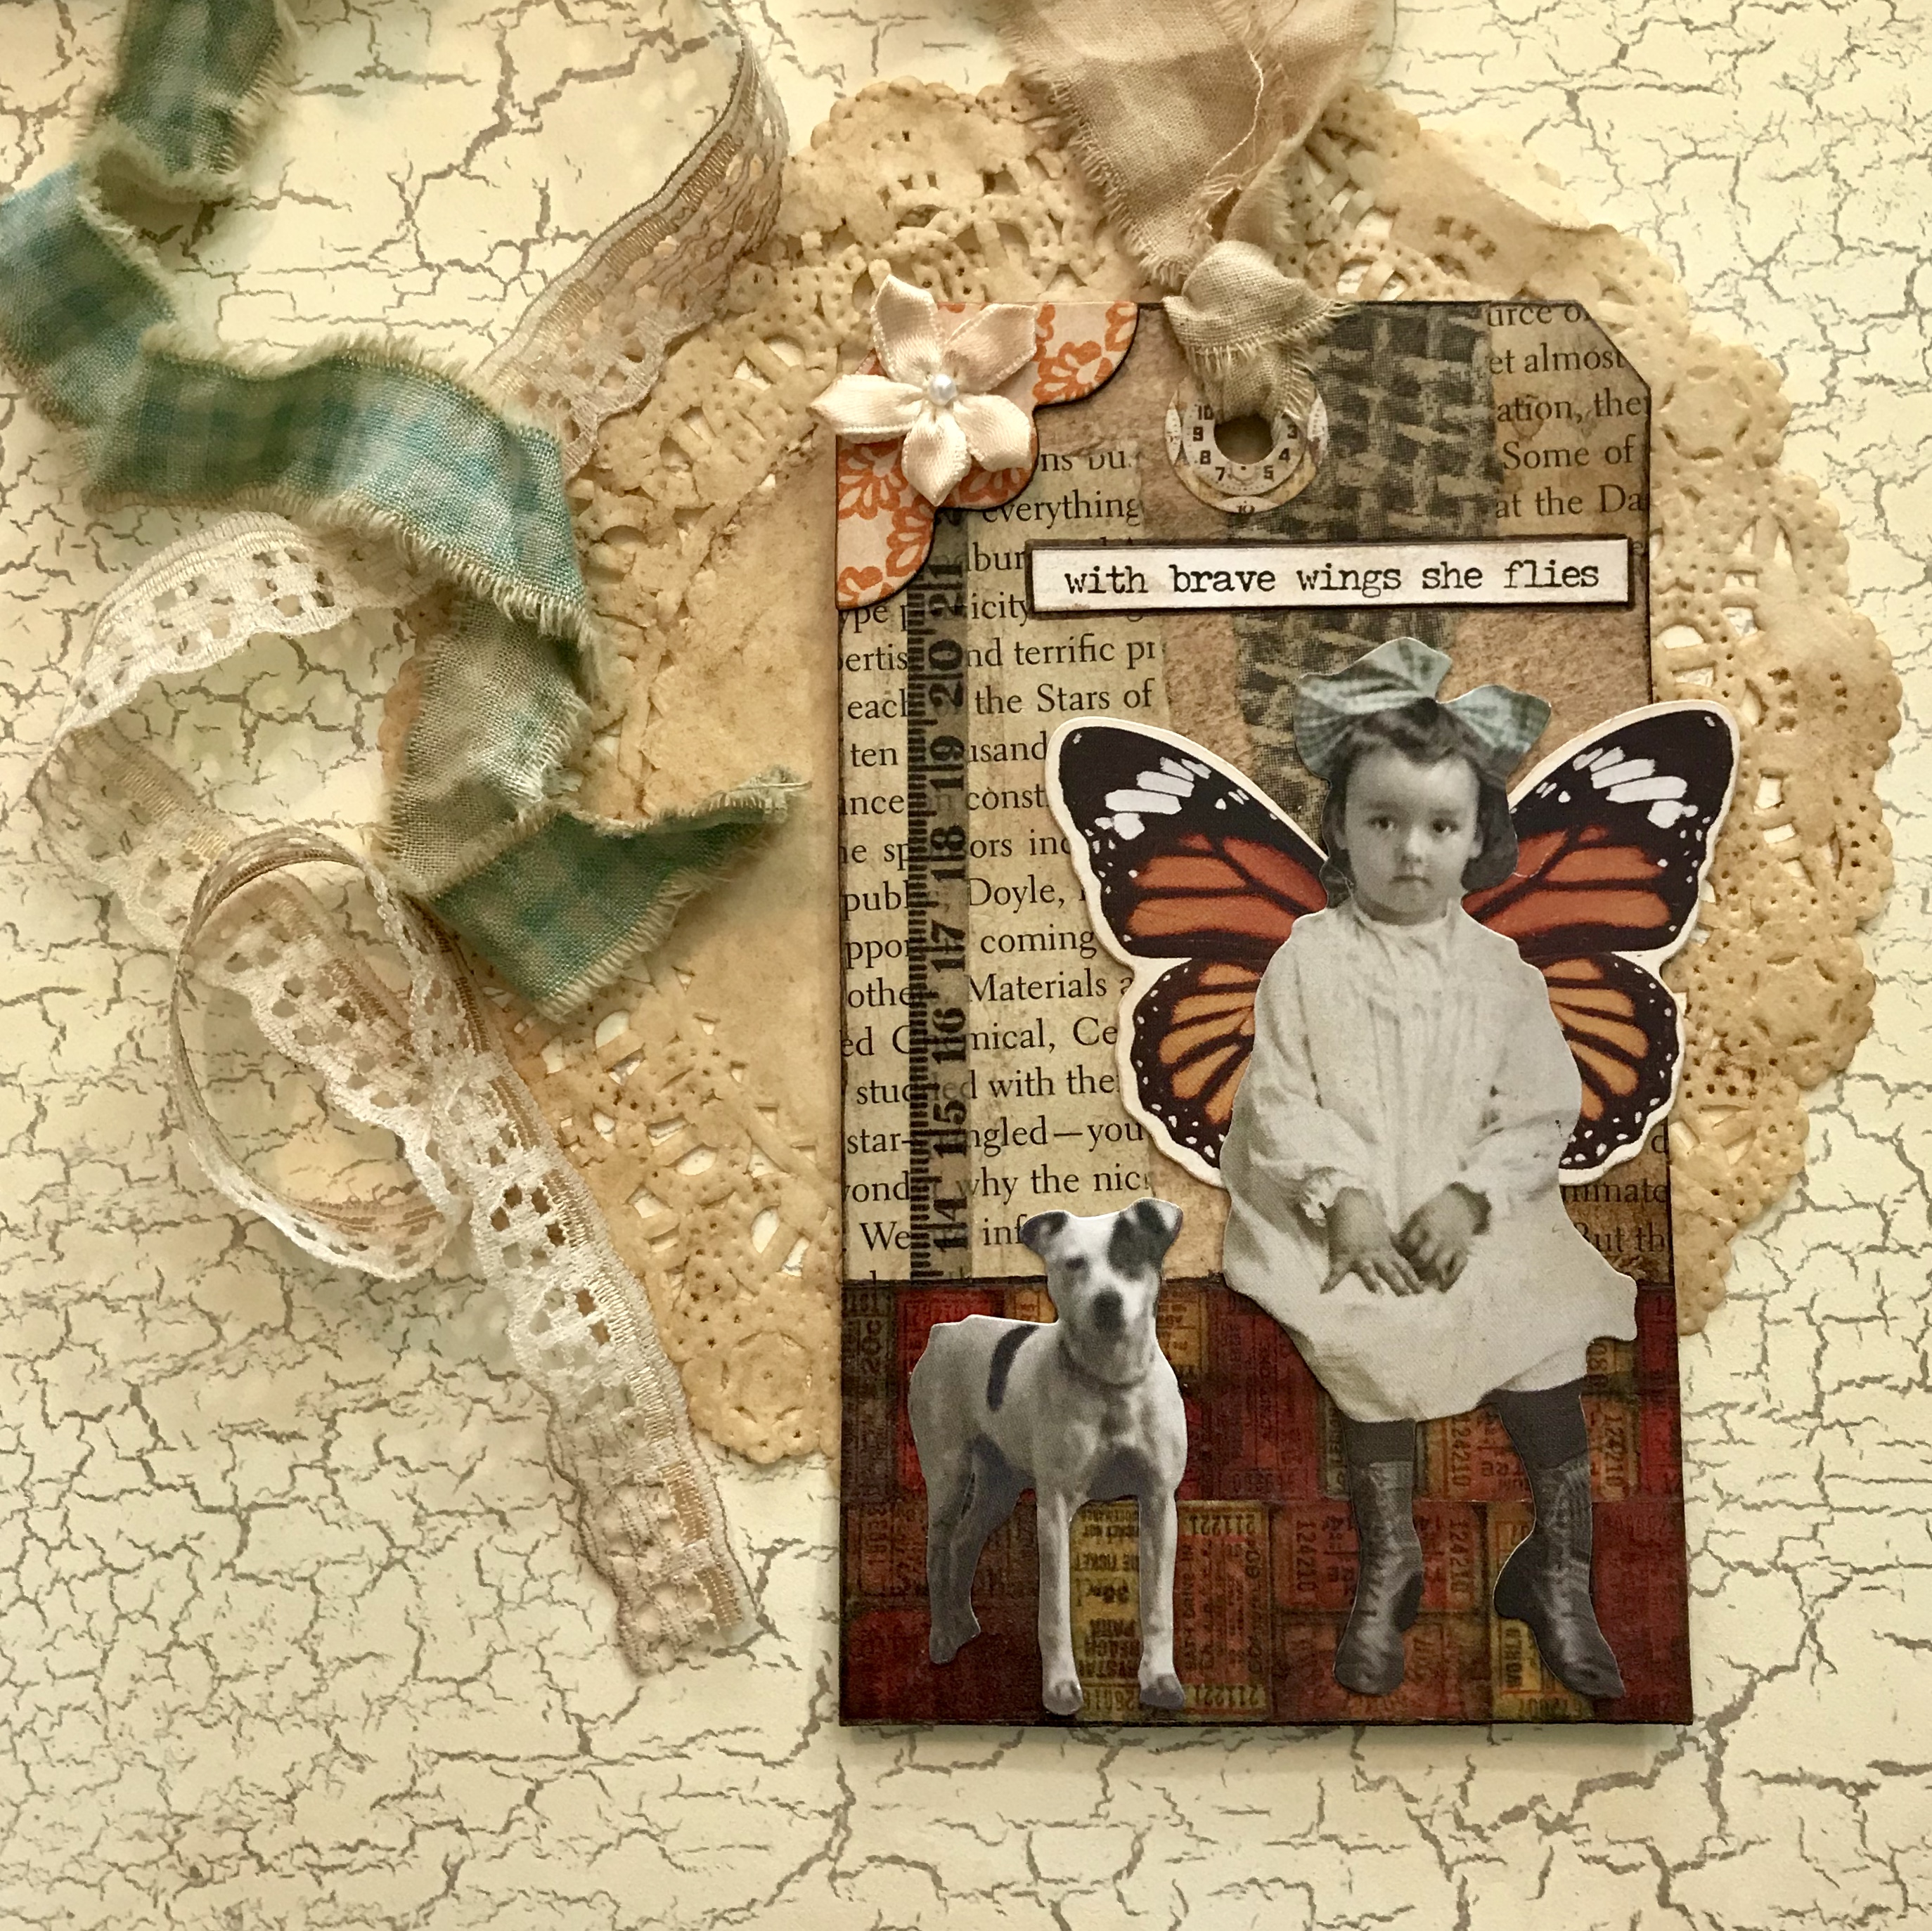
I had so much fun creating some little vintage-style tags from product packaging in my Mixed Media Morsels, Dessert #8 video. I really loved each one, but the little girl with butterfly wings was my favorite, so I decided to make a similar one for this month’s tag.

After filming the video, I added a bit more embellishing in the top left-hand corner of the tag,  using up some older items from my stash. I also colored the little girl’s hair bow very lightly with a Faber-Castell Pitt pen.

3DC7739D-5B7D-40CB-8CB1-6C3FFCB714FE

0169A8E3-2598-4897-928B-5DC6FA2CF0C2

I really enjoyed creating this tag to add to my tag book – that little girl is just too adorable! It has been very easy to add a new tag to my book once a month and I’m thrilled with how it’s filling up. I hope you are making some tags and creating your own tag book along with me! 😊

See you next time,

Cat


Visit my Amazon store for products I use and recommend.

Creating simply sounds so easy, doesn’t it? The problem is, we make things more difficult than they need to be. I’m just as guilty as the next guy for getting in my head too much when I get ready to create something, and I have to make a conscious effort not to do that. Limiting your supplies is a good way to simplify a project and not feel so overwhelmed by the creative process. Pick out four or five supplies and commit to using only those things. This will help you to loosen up and play more freely, and you may be surprised by what develops!

When I was creating my Mixed Media Morsels – Dessert 7 video for my YouTube channel, I added one of my tissue box flower embellishments to a simple black and white tag I had created a while back. I loved how it looked (see pic below), so I decided to create a similar one to show the simple steps I used… and also because I wanted one to put in my tag book this month, lol!

IMG_E2888e

The tag base I used in my video was purchased as a printed tag with the text already on it. The new tag I made started as a blank one, so I covered it with text by using a stamp and some StazOn black ink.

IMG_E2898e

The next step was adding the napkin, which I adhered with some Collage Pauge (Matte). I also colored a plain white reinforcement sticker with a black Faber-Castell Pitt pen, and I adhered it to the hole in my tag. I love the effect of adding a napkin over printed text or music; this works best if you use a napkin with lots of white space.

IMG_E2900e

Then I added my phrase, taken from the Tim Holtz Small Talk sticker book. I outlined the phrase with a gold Painters pen and a black Sharpie pen. I also used the Painters pen to draw a thin, gold outline just inside the edge of the tag.

IMG_E2903e

I used the Pitt pen again to blacken the tag’s outer edge and then adhered the flower I created with some punched tissue box pieces and a silver sequin.

IMG_E2910e

Lastly, I pulled a yellow ribbon through the tag’s hole and tied it with a piece of baker’s twine.

IMG_E3047e

So simple, yet really pretty!

IMG_E3044e

If we make a conscious effort to create simply, it will help us to focus better and understand what we’re doing, as well as build our confidence. So let’s shove that nagging fear aside and make things that are simply beautiful!

See you soon,
Cat


Check out my Amazon store to see products I use and recommend.